
My Freediving Course Experience
Despite its name, freediving does not mean going diving without having to pay. Rather, it means being free of gear and air. Scuba divers rely on tanks of air and other equipment to allow them to stay underwater for a long time, but freedivers rely on their own breath-holding abilities and minimal gear.
As mermaids, it is a valuable skill to be able to hold our breath for a few minutes. It is useful for tank and aquarium performances and underwater photoshoots, or even just for impressing people!
Being able to stay underwater for longer isn’t just a good skill for being a professional mermaid. Any lover of water can benefit from this skill. Being underwater can feel euphoric, especially when swimming in the ocean, where there are so many beautiful things to see!
Scuba diving can be expensive, but freediving doesn’t require too much expensive equipment, like oxygen tanks. You just need a wetsuit, some goggles, flippers, and a snorkel, though you can also freedive without some of those things.

I decided to learn for myself. Since freediving is the art of holding your breath, I signed up for a freediving course to get certified. My first motivation for it was that I’d never been trained in freediving before and I wanted to be able to help others learn about increasing their breath-hold. People have often asked me for advice on how to hold your breath longer, but I never really had an exact answer.
My second motivation was that I was representing Canada in Miss Mermaid International, a mermaid competition that took place in Egypt. A breath-holding challenge was part of the competition and I wanted to perform well. I was able to swim 60 meters in my monofin while holding my breath at the competition, something I am pretty proud of!

I got my freediving certification with PADI agency while on a vacation on the island of Cozumel, Mexico. It cost around $400 and was a 4-day experience. My instructor was Julie from swimfreedivecozumel.com
Before my course, I could hold my breath for 35 seconds while I swam around. After taking a freediving course I can happily say my new time for a dynamic breath-hold is one minute, and two minutes for a static breath-hold!
In case you’ve considered taking a freediving course, but don’t know what to expect, I’m going to walk you through my experience day by day so you can decide if this is something you want to do.
Summary of objectives of level 1 PADI freediving course
- Swim one minute down to 10 meters
- Have a static breath hold of a minute and a half
- Dynamic swim for 25 meters

Day 1 - Classroom (4-5 hrs)
The first day was dedicated to freedive theory. The instructor answered the question “what is freediving?” and went into the specifics, such as the science and method behind it.
The instructor started by teaching us about the different kinds of breath-holds.
- Static- Holding your breath while remaining still.
- Depth- Holding your breath while diving down, trying to get as deep as possible.
- Dynamic- Holding your breath while swimming horizontally for as far a distance as you can.
Lowering your heart rate
I learned that holding your breath is all about minimizing the energy you use and lowering your heart rate. Lowering your heart rate also lowers your consumption of oxygen. Minimizing your effort conserves oxygen. We learned that there are certain breathing exercises to lower your heart rate. There is also equipment that helps you track your heart rate and oxygen levels.
Before going into the water, you always want to lower your heart rate by taking deep, slow breaths. There is a proper way to breathe in preparation for a free dive.
Breathing exercises
When we inhale, we need to use our diaphragm to make space in our lungs. You should be moving your stomach when you take deep breaths; expanded while inhaling, and concave while exhaling. Your shoulders should not be moving up and down.
Then you need to exhale for twice as long as the inhale. You repeat this exercise for a few minutes before beginning your dive.

Equipment
An oximeter is a device that clips to your finger and measures your heart rate and the percentage of oxygen in your blood.
You can also use a smartwatch, Fitbit, or other fitness devices to monitor your heart rate and check that your deep breaths are doing the trick. Just make sure to use one that is waterproof.

Buoyancy
Buoyancy plays a big part in free diving. It’s the ability to float, and when free diving, you want to be able to effortlessly float back to the surface to save energy. But if you are too buoyant it will be difficult to dive deeper, since your body will be trying to bring you back up. Weight belts are used to achieve neutral buoyancy, so you will not have to fight to swim down or struggle when coming back up.

Gear
Fins- Fins allow you to swim easily without expending as much energy from kicking. The fins give you good propulsion so you can glide with fewer kicks. Long fins are the type of fin typically used in freediving. The longer they are the more propulsion they give you.
Wetsuit- A wetsuit aids in diving by keeping you warm and helping you preserve energy. When we are cold our bodies use more energy to try to keep us warm, which is why a wetsuit helps. Another reason is the air bubbles they contain. Air bubbles in the neoprene allow you to easily float back up because they add buoyancy. At a certain point in your descent, you will be neutrally buoyant from the wetsuit.
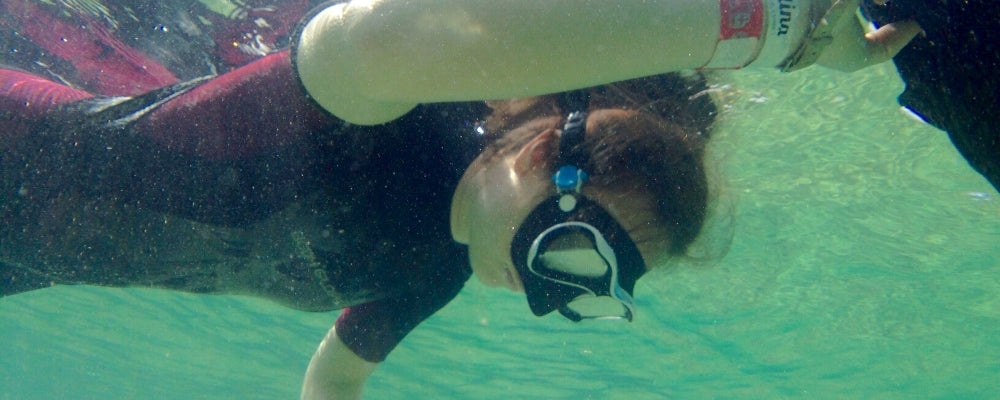
Mask- In general, it is good to have visibility for practical purposes. Free diving, while a sport for some, is also an enjoyable hobby for ocean enthusiasts, and masks help you to see the underwater world. In freediving you use a different mask than when scuba diving. It’s important to use a low air capacity mask. The deeper you go, the air in your mask will get compressed and will squeeze on your face. That is why you want the smallest mask possible.
Snorkel- The snorkel is useful before a dive, or after resurfacing. You want to stay relaxed and keep your heart rate low before going back down, and keeping your face in the water triggers the mammalian diver’s reflex. You float on your stomach with your face in the water, breathing with the snorkel before each descent instead of keeping your head outside of the water and spending energy treading water.

Day 1 summary & personal opinion
We learned all about technique, theory, gear, and the mammalian diver’s reflex, which is a physiological reaction to being in the water with a heart rate lowering effect. It was a very educational day. Along with learning the basics, we practiced static breath-holds.
This was an all-new experience for me. I’d never timed my breath-hold before or worried about increasing my breath-hold. Training alongside others definitely adds a certain pressure to perform just as well, so I pushed myself to keep up with everyone.
I found that the first 15-30 seconds were the hardest, but by the end of the day, my static breath-hold time was a minute and 15 seconds.

Day 2 - Static and dynamic apnea sessions (3-4 hrs)
Day 2 was exciting because we actually got to go in the water. Before going in the water, we learned about the depth we could dive based on how long our static breath-hold was. You divide your static breath-hold in half and that number is approximately how long you can hold your breath for. Then you allow for one meter per second. A 60-second static breath-hold will allow you to hold your breath for about 30 seconds in the water while moving. That means your safe dive distance is 30 meters. You don’t want to dive as deep as the dive distance since you will need to save your air for when you swim back up. You would dive down 15 meters down and then 15 more when ascending.
Stretching- You need flexible lungs and a flexible torso to be able to store more air in your lungs for when you dive. So, we began the day by stretching our torso.
Breath-hold tables- Once we were all stretched, we suited up and grabbed our gear to head to the water where we would do breath-hold tables. Breath-hold tables are guides that give you times for how long you should be holding your breath, and how long to recuperate until the next breath-hold. They help to increase your tolerance to CO2 by gradually increasing the breath-hold times and decreasing recovery times. While just starting off, you would hold your breath for the short amount of time, and then breathe out and take deep breaths for twice as long
Static breath-holds-. We used breath-hold tables to practice our static breath-hold. We did these while floating on top of the water with our faces submerged, which triggers the mammalian diver’s reflex. I was able to hold my breath for up to two minutes. Being in the water and staying still while holding my breath felt relaxing, almost like I was falling asleep. I did feel the need to swallow air and my stomach contracted a bit, but I pushed through it and made it to two minutes.

Diving
After all that, we did our first freedive in open water. We went out into the ocean with our instructor, who brought along a buoy with a rope attached. The rope was descended at 10 meters deep.
Before the dive, we did a breathe-up, where we laid on our stomachs atop the water and took deep breaths through our snorkel until we were ready to do one big peak inhalation before removing our snorkels and diving down. We held onto the rope as we dived down, pulling ourselves to whatever depth we were comfortable at.
Once we felt we needed air we would slowly float back up. Once you’re a foot or two from breaking the surface you need to start exhaling all of your air. Then grab the buoy and take a huge breath, forcing as much air into your lungs as possible.
Equalizing- As we held onto the rope while descending it was important that we also equalized. This relieves the pressure in your eardrums. You hold onto your nose and blow through it, which causes a little popping feeling in your ears.
Weight belt- To control our buoyancy we had to wear weight belts, which needed to be adjusted before diving. The weight belt can help you to stay neutrally buoyant, which means you aren’t floating or sinking. At 10 meters we checked to see if we were neutrally buoyant by making an “x” position with our bodies, meaning we held our arms up wide and spread our legs, letting ourselves just float there. We wanted to make sure we neither sank nor floated.
Day 2 summary & personal opinion
The second day was exciting since we were able to put all the techniques we learned into action. I realized how effective longfins are with helping to conserve energy.
I felt it was easier holding my breath in the ocean than on land since there were many beautiful fish swimming all around to distract me from the discomfort of the CO2.
My favorite part about freediving in the water was the ascent. You only have to do a couple of small kicks in your long fins and then the air bubbles in the wetsuit will help you easily glide upward. It made me feel like a superhero flying up into the sky.
Day 3 - Depth freediving, open water sessions from the beach (4-5hrs)
On day 3 we discussed diving safety, mainly what to do if someone passes out, and some important signals to use.
One important rule we learned is to always dive with a buddy. Diving alone is dangerous because if you pass out from holding your breath for too long, no one will be there to help you.

What to do if someone passes out
If someone passes out, you must bring them back to the surface and make sure to keep their airway open. They will likely gain consciousness in a few moments. You want to stay right next to them and hold onto them, since they will likely be weakened or dazed from passing out. That is why you never dive alone!
Hand signals
While diving it is important to know certain hand signals so you can communicate. If you’re underwater you obviously can’t speak to one another, but there are gestures to make with your hands. The most common one is the “ok” signal. You give someone this signal by putting the tips of your thumb and forefinger together and holding up the rest of your fingers. This is used to check that everyone is okay. You give the signal back to say that everything is fine.
There are various other signals used in scuba diving, but mainly we just used the “ok” signal for freediving.
More freediving
After learning about safety, we got to go back into the water for some more freediving. This time we did not use the rope. We learned the proper way to dive down, by starting in a horizontal position. Then you bend at the waist and kick your legs up so you will be in a vertical position. You let your body weight help you sink down before starting to kick.
We practiced for a little while, making sure to equalize as we descended. When I reached the ocean floor, I grabbed a handful of sand and threw it, as if to say, “I did it!” It was kind of like when you throw confetti in celebration.
We did the 10-meter dive several times. We worked on building our confidence and improving before we went any deeper.

Environmental talk
We also discussed the environment that day. We learned how bad plastic straws are for the environment, and a solution to this problem is to use reusable straws, or just to go without them.
Plastic bags are another product that end up in the sea far too often. This is dangerous for creatures like sea turtles, who mistake them for jellyfish and eat them, but are unable to properly digest them.
Plastic is not biodegradable, so it stays in the ocean forever, wreaking havoc on ecosystems! Other things that are harmful to the environment include glitter, plastic toothbrushes, balloons, disposable utensils and cups, and those plastic rings that hold cans together.

Day 4 - Boat trip to freedive the reef
By the fourth day, we were finished learning about theory and technique and were ready to go put our skills to the test some more! We got to do an open dive at El Cielo, home to one of the most popular coral reefs in the world.
El Cielo is a serene beach with white sand. There weren’t a whole lot of people there, so it was nice and quiet.
The blue water was crystal clear, making it easy to see the many beautiful creatures. El Cielo is inhabited by starfish, manta rays, sea turtles, and so much more. We got to see many fish, eels, and rays.
It was an incredible experience. Swimming there in my mermaid tail made me feel like I was in the Pirates of the Caribbean. It was so magical! We were able to take some beautiful underwater photos while swimming there.
We got more practice holding our breath and employing all the techniques we learned. The more practice we got, the more it became a habit to be able to hold our breath easily. Seeing so many amazing sights definitely made it easier to stay underwater on just one breath.
Without all the equipment used in scuba diving, the fish were less afraid of us.

Overall thoughts:
Freediving and mermaiding can be bridged together. Freediving is about diving as deep as possible in one breath and pushing your limits. The safety skills we learned are useful when it comes to mermaid swimming. Mermaiding is a sport, hobby, and can be for performance. Learning to hold your breath longer is a great practice when it comes to performing in aquariums and tanks.
I enjoyed my freediving course and would recommend any lover of swimming and the ocean to take one as well.
Article edited by Olivia Gilbert